Published
28th February 2017
In this installment of our blog series on Basic Audio Techniques for Video we’ll how to properly use the tie bar when miking talent. If you missed the previous installment explaining how to choose handheld microphones you can read it here.
Lavalier microphones are used for a variety of television, theater, and public speaking applications. In order to capture clear audio, it’s imperative that you properly rig the microphone on your talent. Read on as we explore how to use the tie bar and explain how to form the proper Newsman’s Loop.

Proper Set Etiquette
Tie bars an efficient way to rig someone in situations where it’s appropriate for microphones to be visible to the audience. However, it’s important to follow proper set etiquette when working hands on with talent. Rigging mics, cables, and transmitter body packs requires a degree of intrusion into boundaries of privacy and personal space. For some of the people that you may be working with on-camera, getting miked may be a new experience. To put the talent at ease, always present yourself as professional and tidy. Make sure to introduce yourself and ask permission before attaching the microphone. If the talent is hesitant, you can enlist the help of a crew member of the opposite sex. When working with minors, ensure a chaperone is present at all times.Preparing the Lavalier
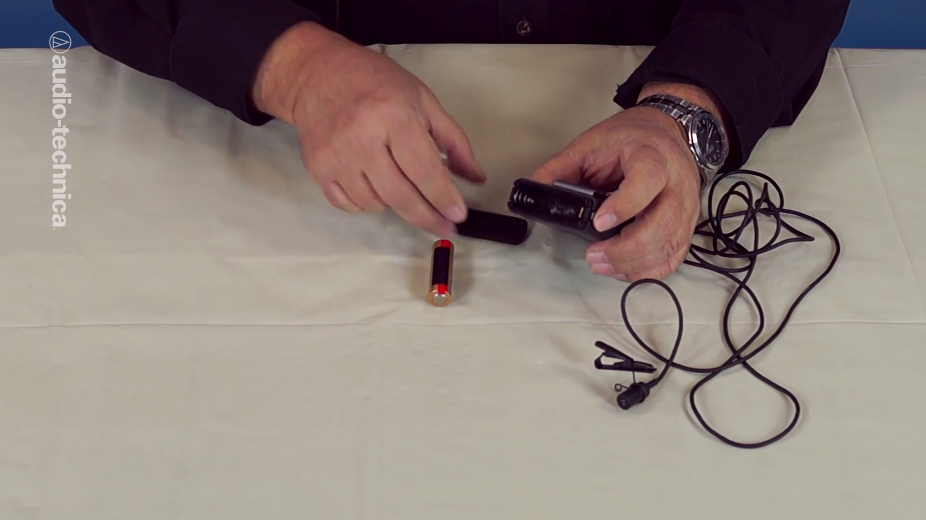
Rigging the Microphone
Take a moment to assess the situation before approaching the talent. Based on the specific scene at hand, determine where it is best to mount the microphone. There are a few basic choices, including: a lapel or center chest, which is best when the talent is wearing a tie, button down shirt, or blouse. When working with female talent, it’s important to note that women’s blouses open from the opposite side as men’s shirts. This means you’ll be required to flip the tie bar before clipping it onto the talent.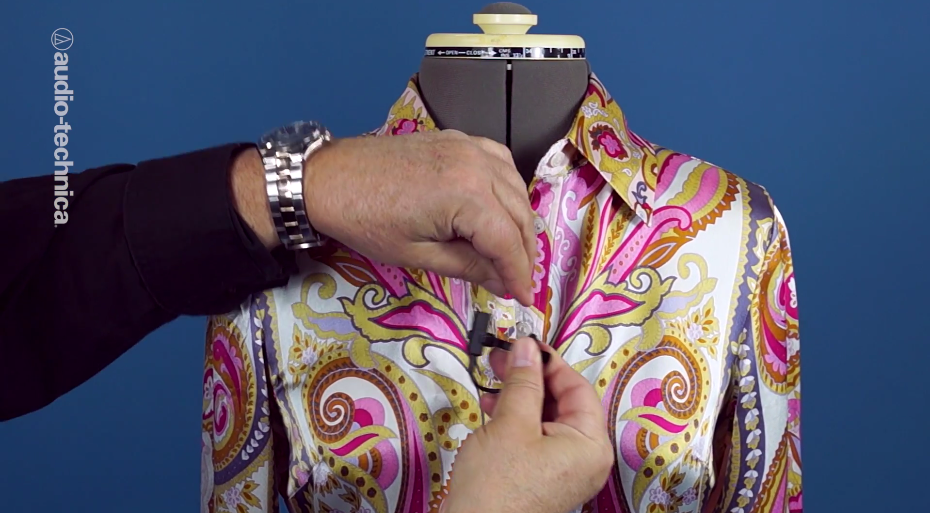 Rigging a microphone to a lapel is a good choice when the talent is wearing a sports coat, vest, or cardigan.
Besides looking directly at the camera, take time to think about which side your talent will likely turn. Public speakers may turn toward one side to reference a projection screen or monitor, while speakers on a panel tend to turn towards the moderator.
Once you’ve determined the orientation of the clip, you can insert or snap the lavalier capsule into place.
Rigging a microphone to a lapel is a good choice when the talent is wearing a sports coat, vest, or cardigan.
Besides looking directly at the camera, take time to think about which side your talent will likely turn. Public speakers may turn toward one side to reference a projection screen or monitor, while speakers on a panel tend to turn towards the moderator.
Once you’ve determined the orientation of the clip, you can insert or snap the lavalier capsule into place.
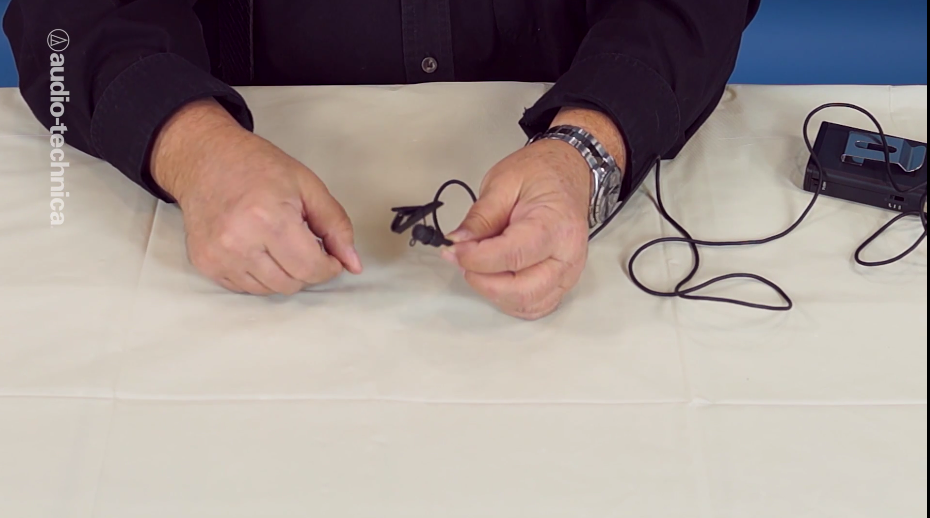
Newsman’s Loop
Much like vibrations carry along a guitar string, handling noise will carry along the microphone cable. The tie bar can be used to combat cable vibrations through a technique known as “The Newsman’s Loop.” Once the microphone is inserted into the spring clip, bring the cable around and up through the hinge of the tie bar, forming a “J.” Then, attach the jaws of the tie bar to wardrobe and continue the loop behind the clothing. The final and most important step is to secure the loop by closing the teeth of the tie bar on the cable. This will not puncture the cable; it was designed to work this way.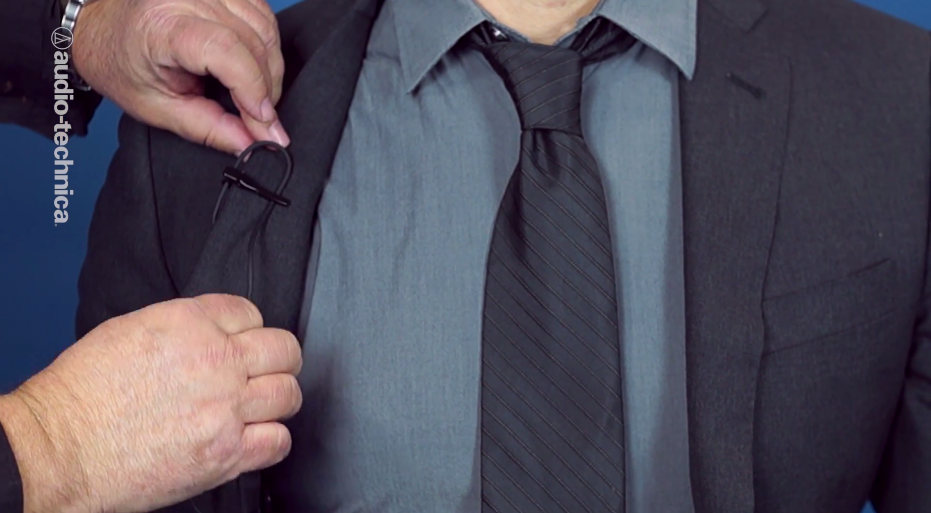 The tie bar will now act as a strain relief, guarding the microphone from any tugging. This will also mute any vibrations traveling up the cable.
Complete the rigging by tucking the trailing cable out of sight. You can hide it inside the jacket, or with the talent’s permission, undo a few buttons and slip it inside the shirt and down to the waistband, where you can bring it around.
The tie bar will now act as a strain relief, guarding the microphone from any tugging. This will also mute any vibrations traveling up the cable.
Complete the rigging by tucking the trailing cable out of sight. You can hide it inside the jacket, or with the talent’s permission, undo a few buttons and slip it inside the shirt and down to the waistband, where you can bring it around.
Wire Basics
The thin wires that connect the microphone capsule to the lavalier’s power module are not as strong as heavy-duty XLR cables. Therefore, they should not be used as extension cables.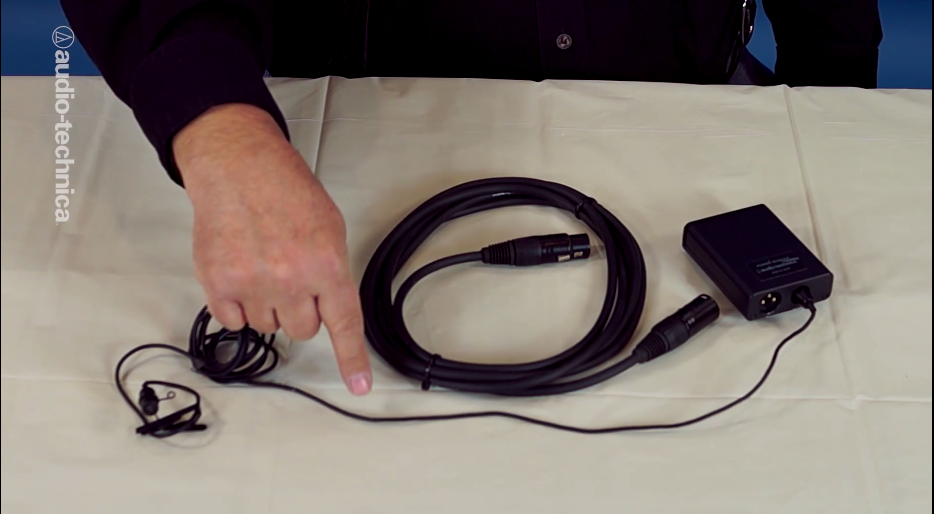 Always anchor the power module directly onto talent. Never use the thin wires to run back to the camera, if the talent moves suddenly the thin wires could be easily damaged.
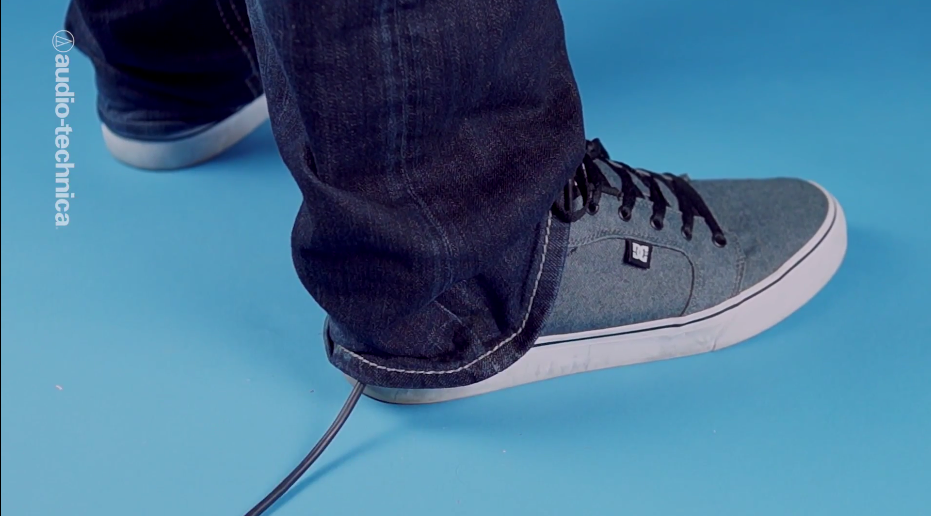
 Clip the power module to a belt or waistband; the module can also be placed in a pocket, if needed. Sometimes you may want to run the wire down the talent’s pants leg, securing everything at the ankle.
Inverted Rigging
Sometimes you may notice someone on television wearing what appears to be an upside down lavalier. This is no mistake; it’s purposely done to reduce popping caused by wind noise. If your talent faces downward frequently or exhales heavily, then soft puffs of wind may strike the microphone diaphragm. One solution is to use a windscreen, though these can be easily lost and often rub against clothing, creating additional unwanted noise.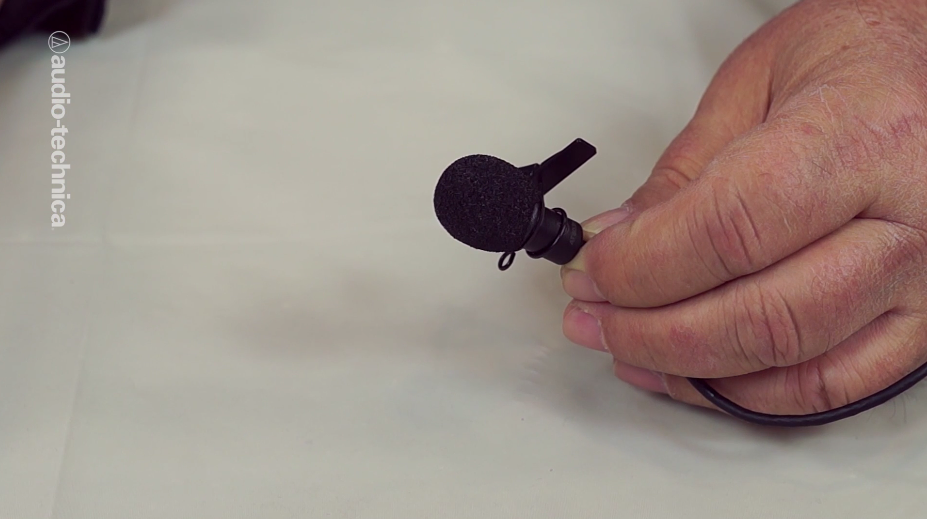 If the lavalier is omnidirectional, it makes no difference if it is facing right side up or upside down.
When the lavalier is inverted, breaths are blocked by the sealed bottom of the mic which is now facing upward.
Miking lavaliers upside down requires some practice and looks strange to an audience, so only use this method when absolutely necessary.
Future installations of this series will explore the topic of working with laveliers in greater detail.
If the lavalier is omnidirectional, it makes no difference if it is facing right side up or upside down.
When the lavalier is inverted, breaths are blocked by the sealed bottom of the mic which is now facing upward.
Miking lavaliers upside down requires some practice and looks strange to an audience, so only use this method when absolutely necessary.
Future installations of this series will explore the topic of working with laveliers in greater detail.