
How to set up an Audio-Technica USB microphone
A USB microphone can be an easy and convenient way to make recordings on a computer system. There is no need for an external audio interface or adapter cables, and, for the most part, it is a plug-and-play process.
The following instructions should help you get your Audio Technica USB microphone up and recording in no time. There are only a few settings you need to configure before you begin recording and podcasting. Please refer to the photos and follow the steps below to properly set up your USB microphone with your PC, Mac or Chromebook.
Please note that we will not discuss recording software; you can use the program of your choice.
PC
1. Connect the microphone to your computer’s USB port using the provided USB cable. The microphone’s blue LED light will illuminate, indicating the mic is receiving power.
2. Locate the speaker icon in the task bar on your computer. It is often located at the bottom right of the screen.
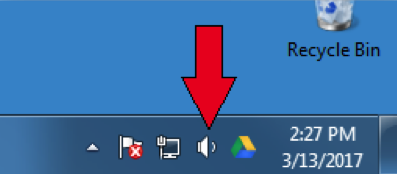
3. Right-click on the speaker icon and select “Sounds.”
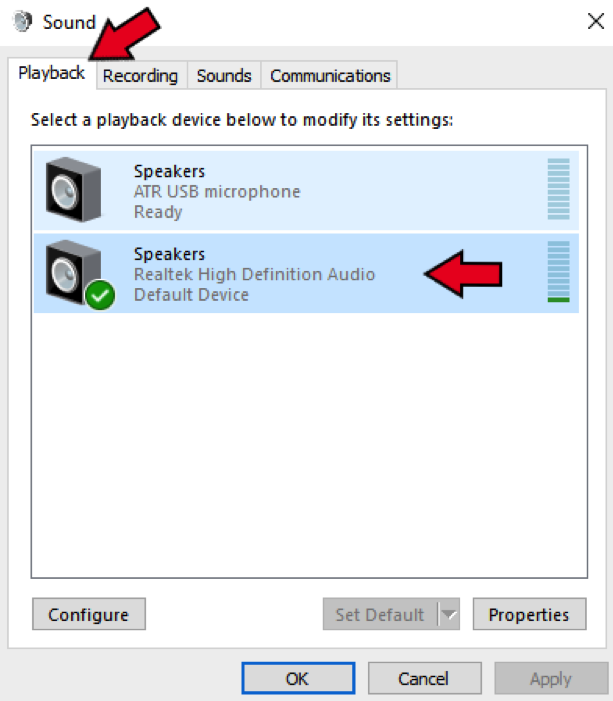
4. The Sound window will open up. Select the “Playback” tab at the top. Make certain the green check mark is next to your computer’s internal speakers, indicating they are set as the default playback device.
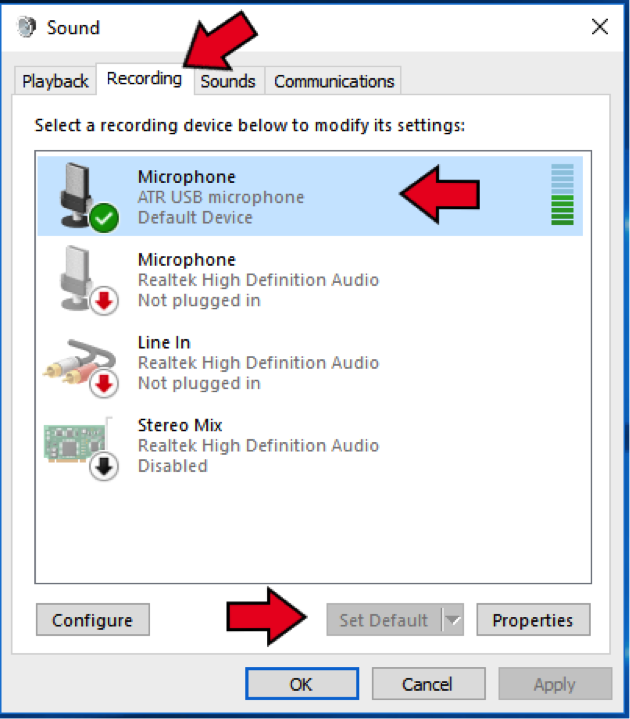
5. Select the Recording tab, and make sure the microphone is set as the default device with the green check mark. If it is not, simply click on the mic to select it, and then click “Set Default” at the bottom of the screen.
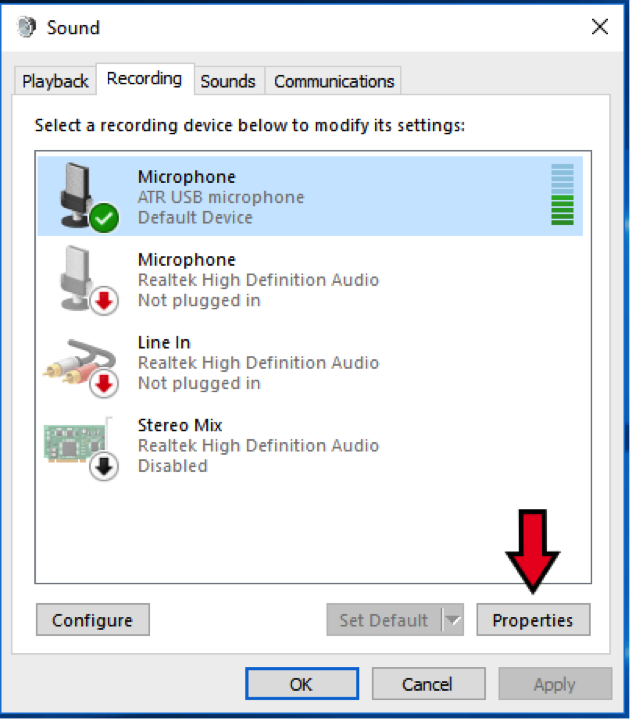
6. Click on the microphone to highlight it. Then click the “Properties” button at the bottom right of the window. You may also right-click on the microphone and select “Properties.”
7. A new window will open. Select the levels tab to adjust the microphone’s audio level.
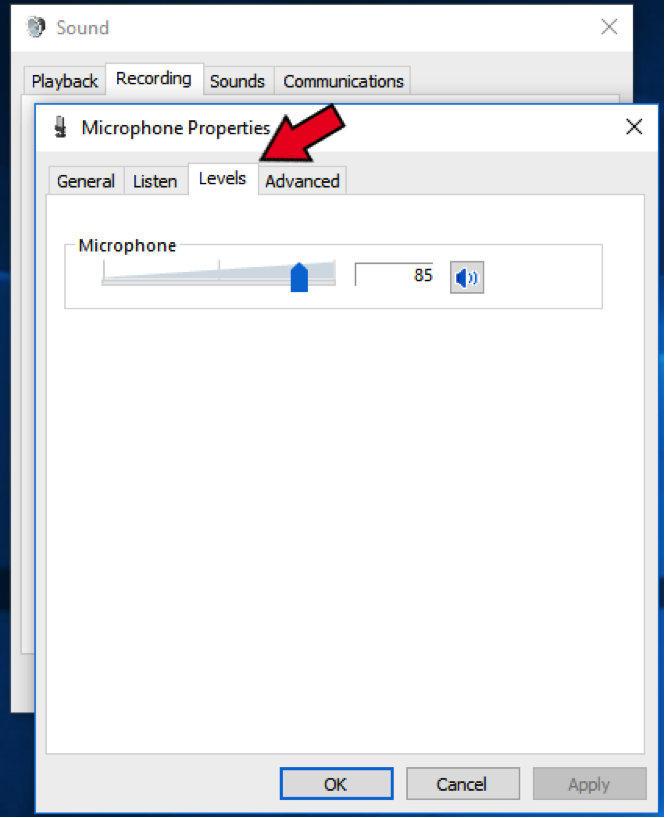
8. Click “Apply” and “OK” to close out of the Microphone Properties window. Then click “OK” to close out of the Sound window.
Mac
1. Connect the microphone to your computer’s USB port using the provided USB cable. The microphone’s blue LED light will illuminate, indicating the mic is receiving power.
2. Click on the System Preferences icon in the dock on your Mac.

3. Click on the speaker icon labeled as “Sound” in this window.

4. The “Sound” window will open up. Select the “Output” tab at the top. Make certain the Mac’s internal speakers (or desired external speakers) are selected, indicating they are set as the default playback device.

5. Select the “Input” tab, and make sure the microphone is selected as the default device. If it is not, simply click on the mic to select it.

Chromebook
1. Log into you Chromebook with your Google account information.
2. Connect the microphone to the Chromebook via the USB cable.
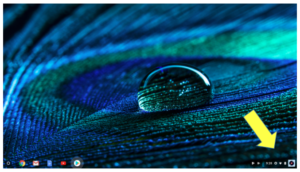
3. Note that in the bottom right-hand portion of the screen you will see the status tray.
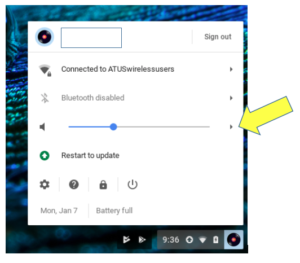
4. In the status tray you will see your profile picture. This picture was set up when the system was installed. In this example, a vinyl record album was used. Click on the profile picture.

5. A panel appears with basic system settings, including Wi-Fi, VPN, Bluetooth, casting functionality, volume, help, and the shutdown button. Notice that to the far right of the volume adjustment is an arrow. Click on that arrow.
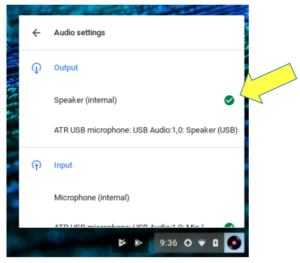
6. The Audio Settings window will open. In the input area, select the USB microphone. In this example the ATR USB microphone is selected. A green check should appear next to the selection indicating that it is the default audio input device.
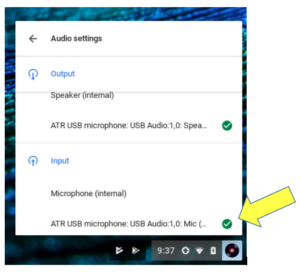
7. You may also select the device to be used as your default output device. The ATR USB microphone is equipped with a headphone jack, and you may select this as the output. You may, however, want to use the internal speakers instead. If so, simply select “Speaker (internal).” Again, a green check will indicate the device you have selected.
That is all you need to do to configure your Audio Technica USB microphone on your chosen OS. Now start your audio recording application and record. If you have further questions, feel free to contact us for assistance.